OwlCircuits
How to attach wires to LEDS
Sometimes you want to remote mount a LED instead of directly soldering it to a circuit board. In order to do that you will have to solder wires onto the LED and then solder the wires into the circuit board. This may seem frustrating at first, but with a little practice you can get quite quick at making up these pig-tail type LEDS.
I learned how to solder LEDS to wires when I had to solder 24 LEDS to wires of various lengths for a firefly LED garden display that I made a few years back.
Try practising on some spare LEDS to get the hang of it. Before you begin, you will want to test your LED and identify which lead on the LED is positive and which lead is negative. It is important to use color coded wires to indicate the positive and negative leads of the LEDS to make it easier to hook the remote LEDS up correctly. Take a look at: How to determine LED polarity for more details.
You will need the following tools and parts:
- Soldering iron
- Solder
- Stranded wire (22-24ga)
- LEDS
- Heat shrink tubing (1/32" works best)
- Wire cutters
- Wire strippers
- A vice or heavy pliers
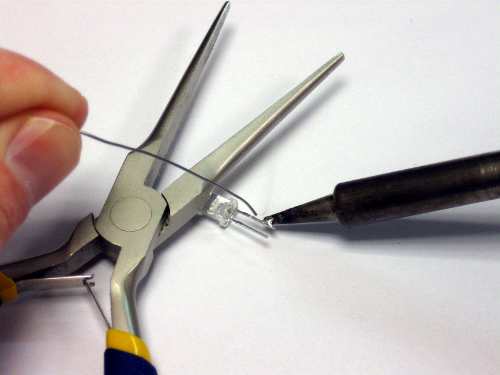
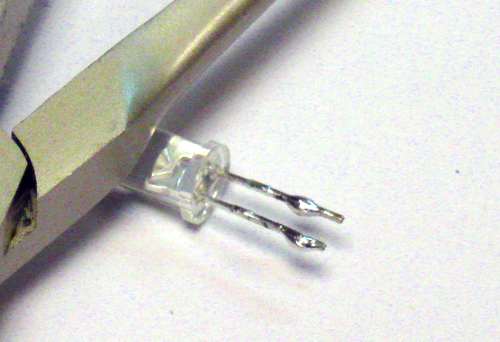
The first step is to cut the LED leads short, about 1/4" or so. Make sure to note which side is the negative lead and which is the positive. If you don't have a vice to hold the LED with, you can put the LED under something heavy like a pair of pliers to steady it. Tin each lead of the LED leaving a little extra solder on the leads.
You want a little extra solder on each lead like the picture below:
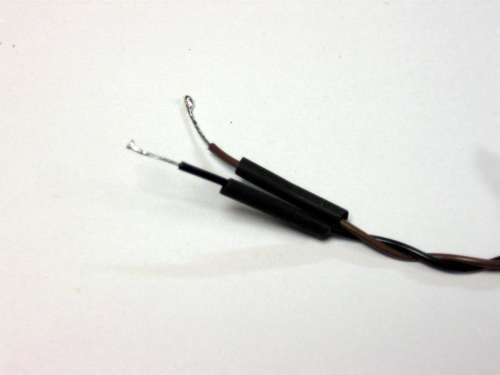
Next take a length of wire for each lead, the length dependant on your application, and twist them together. Twisting the wires together helps to prevent tangles later. Strip a portion of the end of each wire. Tin the wires and make sure to leave a little extra solder on the wires. Slide on a small portion of heat shrink tubing over the wire as shown in the photo below:
Next, simply place each wire parallel to the LED lead and heat the wire and LED lead until the solder melts together. Hold the wire steady while it cools. It will take a little practice for this step before you get the hang of it. Make sure to solder the correct wire color to the correct LED lead so that you know which wire is positive and which one is negative.
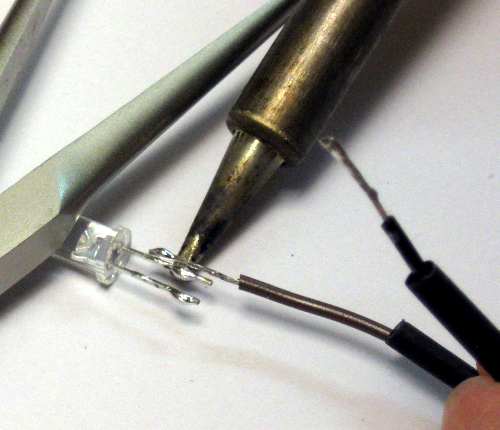
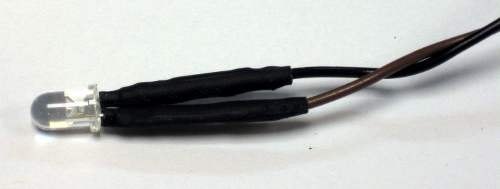
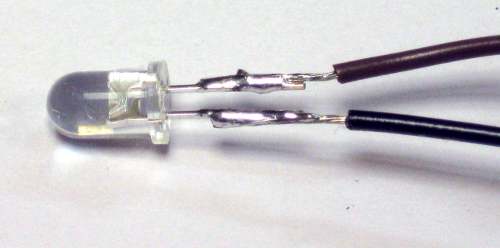
The LED should now look like the photo below. In this case, the black wire is negative and the brown wire is positive. Using two different color wires makes identifying the polarity easier later. Make sure to be consistent in your wire color coding.
Finally, slide the heat shrink over the LED leads and heat it gently with the soldering iron. Make sure to not leave the iron in one place too long or you may melt the solder under the heat shrink. Move the iron back and forth to evenly shrink the tubing around the LED and wire leads.
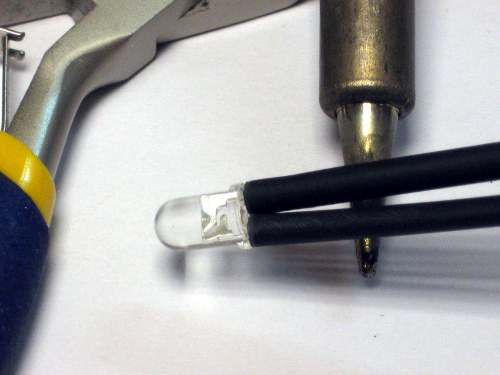
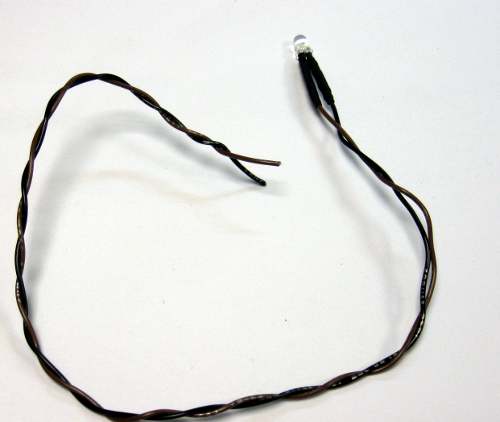
The completed LED on a wire should look like this: